Zoom meetings are becoming the in-thing, and a crucial aspect of such meetings is having them recorded for future reference or clarity.
We have broken down a guide on how you can record a zoom meeting; you can also read here how you can start and set up a Zoom Meeting.
Enabling local recording
Account
- Sign in to the Zoom web portal as an administrator with the privilege to edit account settings.
- In the navigation menu, click Account Management then Account Settings.
- In the Recording tab, navigate to the Local Recording option and verify that the setting is enabled.
- If the setting is disabled, click the toggle to enable it. If a verification dialog displays, click Turn On to verify the change.
- (Optional) If you want to make this setting mandatory for all users in your account, click the lock icon, and then click Lock to confirm the setting.
Group
- Sign in to the Zoom web portal as an administrator with the privilege to edit user groups.
- In the navigation menu, click User Management then Group Management.
- Click the name of the group, then click the Settings tab.
- In the Recording tab, navigate to the Local Recording option and verify that the setting is enabled.
- If the setting is disabled, click the toggle to enable it. If a verification dialog displays, click Turn On to verify the change.
Note: If the option is grayed out, it has been locked at the account level, and needs to be changed at that level. - (Optional) If you want to make this setting mandatory for all users in this group, click the lock icon, and then click Lock to confirm the setting.
User
- Sign in to the Zoom web portal.
- Click Settings.
- In the Recording tab, navigate to the Local Recording option and verify that the setting is enabled.
- If the setting is disabled, click the toggle to enable it. If a verification dialog displays, click Turn On to verify the change.
Note: If the option is grayed out, it has been locked at either the group or account level, and you will need to contact your Zoom administrator.
Starting a local recording
The host must record the meeting or grant the ability to record to a participant.
- Start a Zoom meeting as the host.
- Click the option to Record.
- If there is a menu, select Record on this Computer.
Hosts will see the following recording indicator in the top-left corner while recording is active.
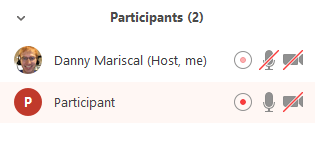
Participants will see the following indicator in the top-left corner while the recording is active. - Click Participants to see which participants are currently recording.
Note: Dial-in participants will hear a message informing them that the meeting is now being recorded unless disabled by the host. - After the meeting has ended, Zoom will convert the recording so you can access the files.
- Once the conversion process is complete, the folder containing the recording files will open.
Note: By default, the audio/video file (MP4) will be named Zoom_0.mp4. The audio only file (M4A) is named audio_only.m4a.
- If the meeting unexpectedly shuts down or if the conversion process is interrupted, the recording files could become corrupted and non-recoverable. Restarting or shutting down your computer, putting the hard disk to sleep, or closing your laptop will interrupt the conversion process.
- If the conversion process is not successful after the meeting has ended, you can try to convert the files again by navigating to the recording location and double clicking the recording files.
- You can record the meeting in different layouts including Active Speaker, Gallery View, and shared screen.
Stopping or pausing a local recording
During a Zoom recording, a participant can Stop or Pause the recording. If a participant stops the recording and starts it again, a new video file will be created for the next recording segment. If a participant pauses the recording and starts it again, Zoom will record to the same video file for the recording segment.
- After a recording has been started, click Pause or Stop Recording at the bottom.
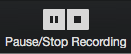
The recording can also be stopped or paused by clicking the indicator in the top left corner. - When a recording is paused, the following indicator will be displayed in the meeting.

- To resume the recording, click Resume Recording at the bottom
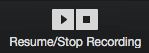
The recording can also be resumed by clicking the indicator in the top left corner.
- After you stop the recording, you can access the local recording files on your computer.
Assigning recording privileges to a participant
- In a Zoom Meeting click on Manage Participants.
- In the Participants menu navigate to the participant who will be granted recording privileges. Click More next to their name.
- Select the option to Allow Record.

The participant will receive the following notification: - When a participant is recording, the participant menu will display a recording icon next to the participant’s name.
- To disable the participant’s ability to record, click More next to the name, then click Forbid Record.
The participant will receive the following notification:
Changing local recording settings
To change local recording settings in the Zoom client:
- Open the Zoom client and click Settings.
- Click the Recording tab.
This will open your recording options that you can change using the client.Note: Setting the default location to a cloud syncing folder (such as Dropbox, Google Drive, or One Drive), an external drive, or network storage device may cause issues with saving and converting the local recording. Zoom strongly recommends keeping the default location on a local drive for recordings.
Recording multiple audio files
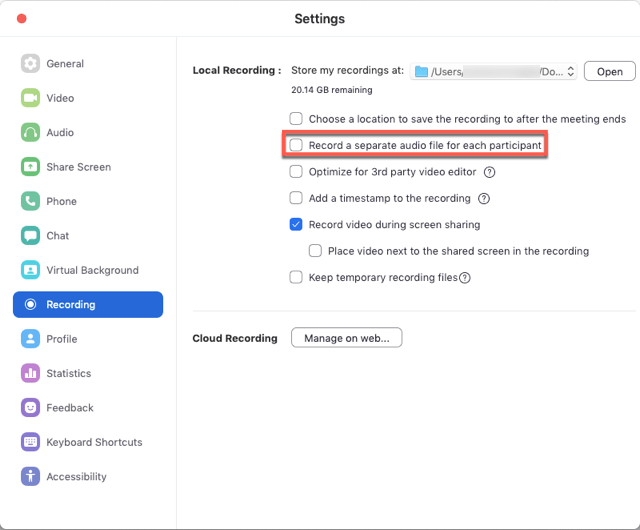
When recording locally, the host can record all participants’ audio streams as separate audio files, one file for each participant. To enable this option:
- Open the Zoom client and click Settings.
- Click the Recording tab.
- Enable Record a seperate audio file for each participant.
- Record and save the meeting to your computer.
- Once the meeting is over and the recording has processed, open the recording folder.
- Within the folder, open Audio Record.
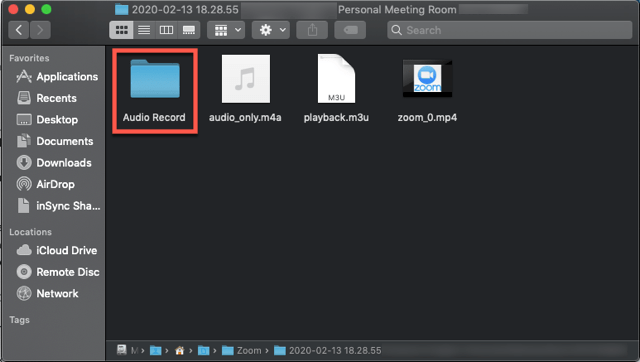
- Once in the Audio Record folder, each participant’s audio track will be listed as its own file in with the file name ending in the participant’s name.

To listen to your recording through the app:
- Open the app
- Click on Meetings
- Click on the Recorded tab
- Your list of recorded meetings will display
- From the app, you can listen directly to the recording, listen to just the audio, or open the recording to the file location.


